What happens if you ignore alerts and lose more disks than your TrueNAS storage pool is configured to tolerate? I unintentionally tested that and had to rebuild from scratch.
How it Failed
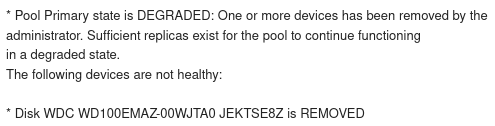
The failure of my NAS was entirely the result of my own laziness. A couple months ago, I received an alert informing me that one of the disks had failed, and the storage pool was degraded. I have six disks configured in a RAIDZ2 pool, so I can lose up to two disks before incurring data loss. I remembered how annoying the disk replacement process is in the case I built my NAS in, and decided to wait for the second disk failure.
In rather predictable fashion, I missed the next disk failure alert. Maybe I confused it with the original alert or just missed the email, but whatever the reason, my next alert that things had gone wrong was the fact that my local Home Assistant installation was no longer available.

Rebuilding
The first step was hardware replacement. At this point, three of the original six disks had failed. The TrueNAS UI was still available because the boot drive had not failed, so I was able to compare disk serial numbers to the ones still available in the UI to identify the dead disks.
Once the hardware failure had been resolved, I rebuilt the pool in TrueNAS.
Data Recovery
I was not totally unprepared for failure, and I had previously configured daily backups to Backblaze’s B2 storage for all the data that would not be easy to reproduce.
Because I use encrypted backups to obfuscate file names and contents, having the encryption key and salt stored in my password manager was a crucial piece of the recovery process.
It was fairly straightforward to configure an ad-hoc task to restore data from B2. The only change I would make in the future is to ensure the datasets in the pool are created before restoring files. Because I restored the data first, I had to move the data, recreate the datasets, then move the data back into the appropriately named locations. This most likely would have Just Worked if I had created the datasets first.
Resulting Changes
I have made a couple changes to how I utilize my NAS. After going through the effort of rebuilding the configuration, I now have a configuration backup (stored in my password manager, not on the NAS) so that I can directly restore after fixing the underlying hardware failures. I have also reconfigured my backups to include everything on my NAS instead of only including non-reproduceable data. Cloud storage is relatively cheap in relation to the time required to replace the missing data.
With regards to the other services in my homelab that utilize the NAS, I have made some additional changes. Previously, most services were running with all config and data paths under the NAS’ NFS mount. This meant that everything was backed up, but it also guaranteed that the service would go down if the NAS failed. Now I run services directly off the storage of the compute node, but with daily VM backups to the NAS.
While it was certainly inconvenient to lose my NAS for about a week, it was satisfying to fix with minimal data loss. Hopefully my next NAS post will be about how long it’s been since a full failure.